 Save
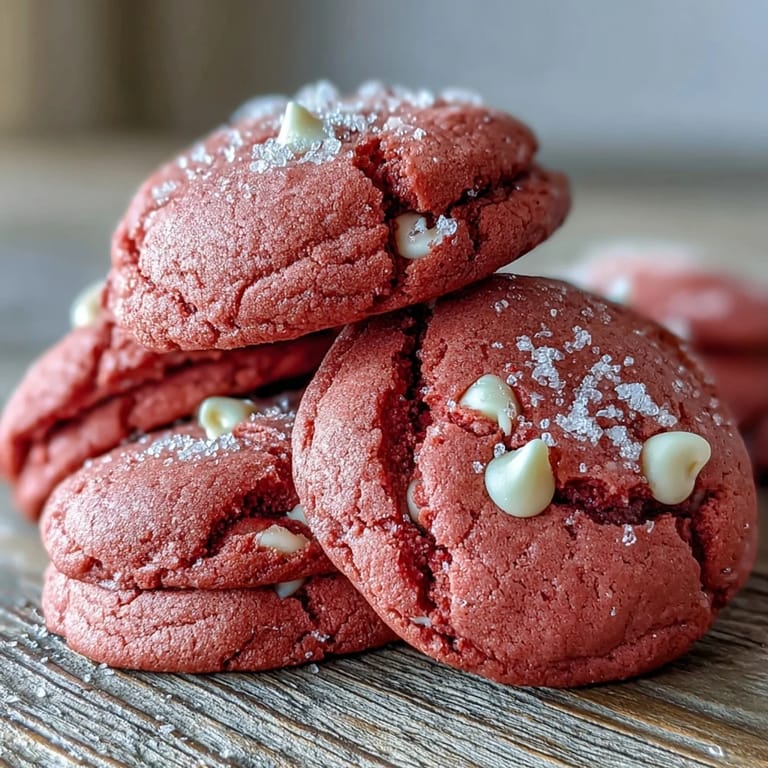
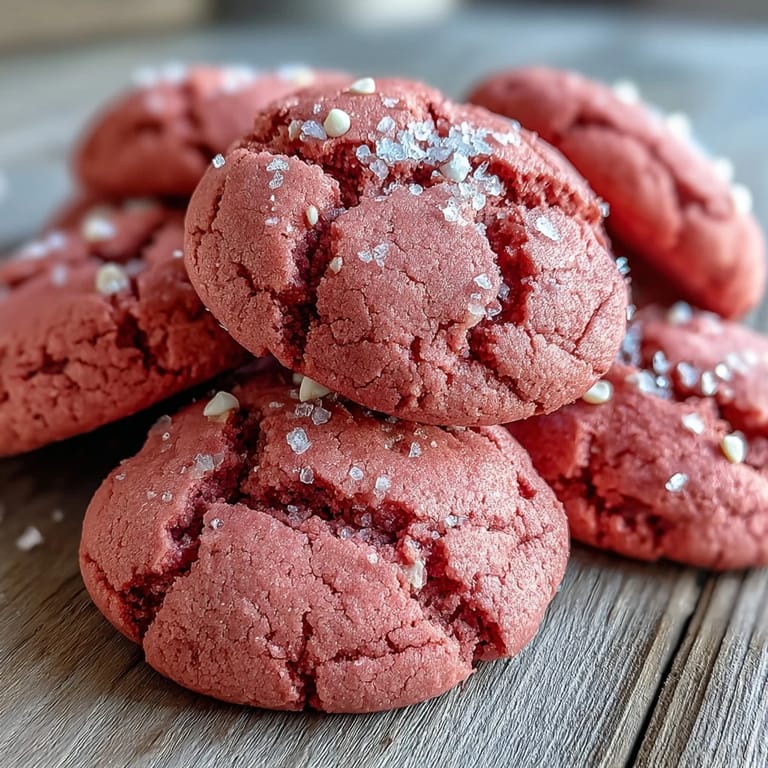
Save The smell of butter and vanilla always takes me straight back to my kitchen counter, covered in a dusting of flour and that little bottle of pink gel coloring I bought on a whim. I was supposed to be making regular sugar cookies, but something about the gray afternoon made me want color. I squeezed in more pink than the recipe called for, and when I pulled those first cookies from the oven, glowing like little sunsets, I knew I had stumbled onto something special. My neighbor knocked on the door an hour later, drawn by the smell, and left with half the batch. They have been a staple ever since.
I made these for my daughters birthday once, and she insisted on helping me scoop the dough onto the trays. Her hands were small, so the cookies came out all different sizes, some giant and some tiny. We baked them anyway, and they were her favorite part of the whole party. Now every time I make them, I think of her flour-dusted fingers and the way she giggled when the pink dough stained her palms. Food has a way of holding onto those moments.
Ingredients
- All-purpose flour: This is your structure, the foundation that keeps everything tender but not crumbly, and I always spoon it into the cup instead of scooping to avoid dense cookies.
- Baking powder and baking soda: The dream team for lift and chew, and using both gives you that perfect soft center with just a hint of crispness on the edges.
- Unsalted butter: Softened means you should be able to press your finger into it easily, and this is where all that creamy richness comes from.
- Granulated sugar: It creams beautifully with the butter and gives you those slightly crackled tops that look bakery-perfect.
- Egg: One large egg binds it all together and adds moisture, so make sure it is at room temperature for the smoothest dough.
- Vanilla extract: Pure extract makes all the difference here, and I have tried imitation before, but it just does not give you that warm, rounded flavor.
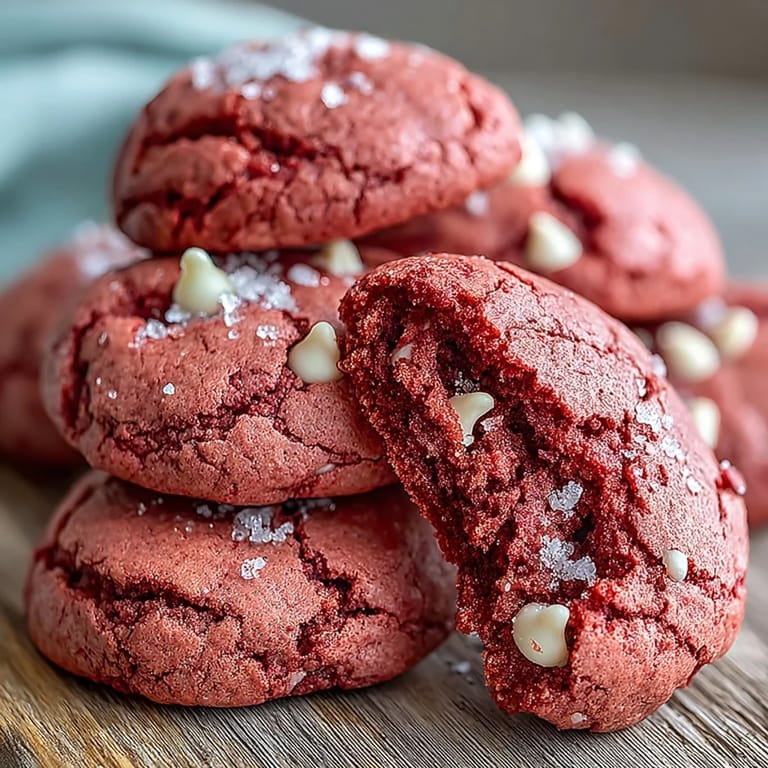
- Pink gel food coloring: Gel is key because liquid coloring will thin out your dough and dull the color, and you control the intensity by adding it bit by bit.
- White chocolate chips: They add little bursts of sweetness and create gorgeous contrast against the pink, and I always keep a few extra to press on top before baking.
Tired of Takeout? 🥡
Get 10 meals you can make faster than delivery arrives. Seriously.
One email. No spam. Unsubscribe anytime.
Instructions
- Whisk the dry ingredients:
- Combine your flour, baking powder, baking soda, and salt in a medium bowl until everything is evenly distributed. This step prevents clumps and ensures every bite has balanced flavor and rise.
- Cream the butter and sugar:
- Beat the softened butter and sugar together for 2 to 3 minutes until it turns pale and fluffy, almost like frosting. This is where air gets trapped, giving you that melt-in-your-mouth texture.
- Add egg, vanilla, and coloring:
- Mix in the egg and vanilla until smooth, then squeeze in the pink gel food coloring and beat until the dough is evenly tinted. Start with less color and add more if you want a bolder hue.
- Combine wet and dry mixtures:
- Gradually add the dry ingredients to the wet mixture on low speed, mixing just until no streaks of flour remain. Overmixing here will make your cookies tough instead of tender.
- Fold in white chocolate chips:
- Use a spatula to gently fold in the white chocolate chips so they are evenly distributed throughout the dough. I like to save a few to press onto the tops later for that bakery look.
- Chill the dough:
- Cover the bowl with plastic wrap and refrigerate for 30 minutes to firm up the dough. This step is not optional, it keeps the cookies from spreading into flat puddles in the oven.
- Preheat and prep:
- Set your oven to 350 degrees Fahrenheit and line two baking sheets with parchment paper. Parchment prevents sticking and makes cleanup so much easier.
- Scoop and space the dough:
- Use a tablespoon or cookie scoop to portion out balls of dough, placing them about 2 inches apart on the baking sheets. They will spread just enough to get those crisp edges without losing their shape.
- Bake until set:
- Bake for 10 to 12 minutes, watching for edges that look set while the centers still seem a little soft. They might look underbaked, but trust me, they will firm up as they cool and stay chewy inside.
- Cool properly:
- Let the cookies rest on the baking sheets for 5 minutes before transferring them to a wire rack. Moving them too soon will cause them to break, and cooling them on the rack prevents soggy bottoms.
 Save
Save One Valentine's Day, I packed a tin of these cookies and left them on my friend's porch after she had a rough week. She texted me a photo an hour later of her kids with pink-stained smiles, and said it was the first time they had all laughed together in days. I realized then that these cookies are not just about sugar and butter. They are about showing up, about color in the middle of gray, about the small things that say I thought of you.
How to Get the Perfect Pink
The color is half the magic here, and I have learned that a little gel goes a long way. Start with just a teaspoon and mix it in completely before deciding if you want more. I once added too much at once and ended up with cookies so bright they looked radioactive, which was funny but not exactly what I was going for. The dough will lighten slightly as it bakes, so aim for a shade just a bit deeper than your target. If you want a softer blush, use less, and if you are feeling bold, go all in.
Storage and Make-Ahead Tips
These cookies keep beautifully in an airtight container at room temperature for up to a week, staying soft and chewy the whole time. I have also frozen the dough in scooped balls on a tray, then transferred them to a freezer bag once solid, which means I can bake fresh cookies whenever the craving hits. You can bake them straight from frozen, just add a minute or two to the baking time. If you want to get fancy, sandwich two cooled cookies with a layer of cream cheese frosting and you have got an instant dessert that feels way more impressive than the effort required.
Variations and Flavor Twists
Once you have nailed the basic recipe, it is fun to play around with flavors and mix-ins. I have added a half teaspoon of almond extract for a subtle floral note that pairs beautifully with the vanilla, and a friend of mine swears by a few drops of rose water for something a little unexpected. You can swap the white chocolate chips for dark chocolate, butterscotch, or even chopped freeze-dried strawberries for bursts of tart sweetness. If you are making these for someone with dietary restrictions, a good 1-to-1 gluten-free flour blend works perfectly without changing the texture.
- Press a few extra white chocolate chips on top of each dough ball before baking for a bakery-style finish.
- Try adding a pinch of sea salt on top right when they come out of the oven for a sweet and salty contrast.
- For a fun twist, use different colors depending on the season or occasion.
 Save
Save There is something about pulling a tray of these cookies from the oven and watching them cool into perfect little pink rounds that feels like a small victory every single time. I hope they bring as much joy to your kitchen as they have to mine.
Recipe FAQs
- → What makes these cookies pink?
Pink gel food coloring provides the vibrant hue. Gel coloring works better than liquid as it doesn't add excess moisture to the dough. Start with 2 teaspoons and adjust to achieve your desired shade of pink.
- → Why is chilling time important?
Chilling the dough for 30 minutes helps cookies hold their shape during baking and prevents excessive spreading. This step also enhances flavor development and creates that perfect chewy texture.
- → Can I make these ahead of time?
Absolutely. The dough can be refrigerated for up to 3 days before baking, or frozen for up to 3 months. Scoop frozen dough balls directly onto baking sheets, adding 1-2 extra minutes to bake time.
- → What's the best way to store these cookies?
Keep in an airtight container at room temperature for up to 1 week. For longer storage, freeze baked cookies for up to 3 months. Separate layers with parchment paper to prevent sticking.
- → Can I use liquid food coloring instead?
While gel coloring is recommended for best results, liquid food coloring works too. You may need 3-4 times the amount, and be careful not to add too much liquid which could affect cookie texture.
- → How do I know when cookies are done?
Remove from oven when edges are set and slightly golden but centers still look soft and underbaked. They'll continue cooking on the hot baking sheet and firm up as they cool for that perfect chewy texture.