 Save
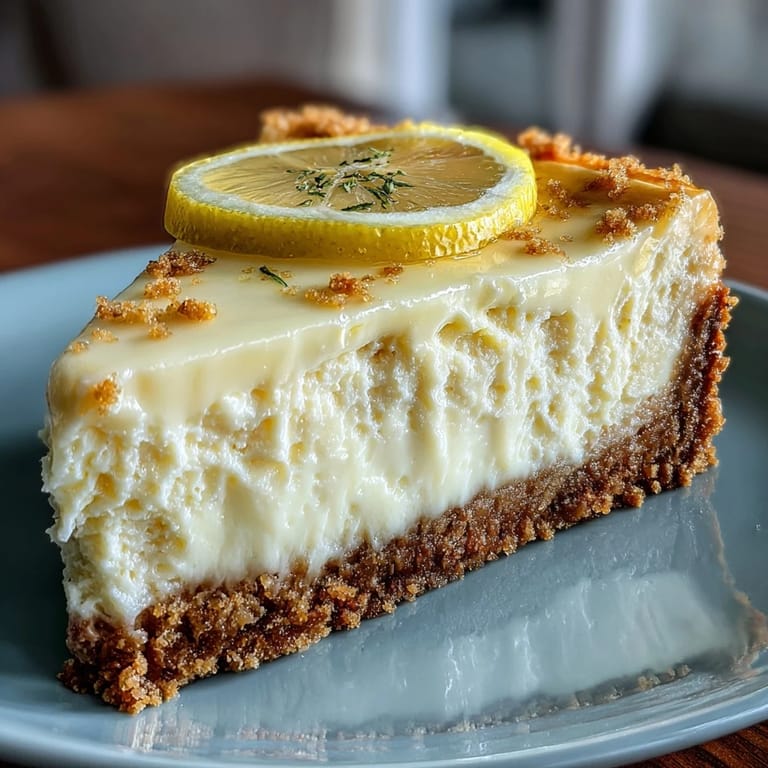
Save Last spring, I was standing in my kitchen on a Sunday afternoon when my neighbor mentioned she was hosting a dinner party the next evening. Without thinking, I volunteered to bring dessert, then immediately panicked—I had zero time for anything that required an oven. That's when I remembered a jar of lemon curd sitting in my fridge and realized I could build something magical around it without any baking at all. These no-bake lemon cheesecake jars came together in less than half an hour, and they were so good that my neighbor asked for the recipe before dessert was even finished.
I've made these jars for baby showers, book club nights, and quiet evenings when I just wanted something pretty in the fridge. There's something about the individual jar presentation that transforms a simple dessert into something that feels special—people always seem delighted by the thoughtfulness of it, even though you've barely lifted a finger.
Ingredients
- Graham cracker crumbs (1 cup): These form the textured bottom layer that gives you something to bite into—don't skip the salt in the crust mixture because it amplifies the sweetness of everything that comes after.
- Unsalted butter (3 tbsp, melted): Melted butter distributes evenly through the crumbs and helps them hold together without any dense spots.
- Granulated sugar (2 tbsp): A small amount sweetens the crust just enough to balance the tartness of the lemon filling.
- Heavy whipping cream (1 cup, cold): Cold cream whips up faster and holds its shape better—pull it straight from the fridge and keep your bowl chilled too.
- Cream cheese (8 oz, softened): Room temperature cream cheese blends smoothly without lumps, so set it out for about 30 minutes before you start.
- Powdered sugar (1/2 cup): It dissolves seamlessly into the cream cheese without the grainy texture you'd get from granulated sugar.
- Fresh lemon juice (1/4 cup): Fresh is non-negotiable here—bottled juice tastes tinny and flat compared to the brightness of juice you squeeze yourself.
- Lemon zest (1 tbsp): Zest before you juice the lemon and use a microplane or fine grater so you get the oils without the bitter white pith.
- Pure vanilla extract (1 tsp): This rounds out the flavor and prevents the filling from tasting one-dimensionally sour.
- Lemon curd (1/2 cup): This is the flavor anchor on top—it's tart, silky, and holds a spoon's shape perfectly.
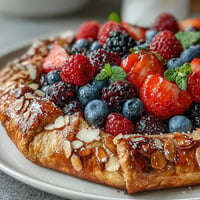
- Fresh berries: Raspberries and blueberries add a pop of color and tartness that echoes the lemon without competing with it.
Tired of Takeout? 🥡
Get 10 meals you can make faster than delivery arrives. Seriously.
One email. No spam. Unsubscribe anytime.
Instructions
- Make the crust:
- Combine your graham cracker crumbs with melted butter, a small sprinkle of sugar, and a pinch of salt in a bowl, stirring until it feels like wet sand between your fingers. You're looking for a texture where the mixture holds together when squeezed but still has some visible crumb texture.
- Layer the crust:
- Spoon about 2 tablespoons of the crust mixture into the bottom of each jar and press it down firmly with the back of the spoon to create an even, compact layer. This is your foundation, so take a moment to make it level.
- Whip the cream:
- In a clean, cold bowl, beat the heavy whipping cream with an electric mixer until stiff peaks form—they should stand straight up when you lift the beaters. Set this aside immediately so it doesn't start to break down.
- Blend the filling base:
- In another bowl, beat the softened cream cheese until it's completely smooth and creamy, then add the powdered sugar, fresh lemon juice, lemon zest, and vanilla extract. Mix until everything is combined and the filling is a pale, fluffy consistency.
- Fold in the whipped cream:
- This is the gentle moment—pour the whipped cream over the cream cheese mixture and fold it in with a spatula using broad strokes, turning the bowl as you go. You want to keep those air bubbles intact, so don't stir or beat—just fold until there are no white streaks of cream cheese visible.
- Fill the jars:
- Spoon or pipe the light, fluffy filling into each jar on top of the crust, dividing it evenly among all six jars. You can use a piping bag for a prettier presentation, but a spoon works just fine.
- Top with lemon curd:
- Add a generous spoonful of lemon curd to the top of each jar—this becomes both a flavor highlight and a beautiful golden layer. The slight tartness of the curd balances the richness of the filling perfectly.
- Chill and set:
- Cover the jars (plastic wrap or lids work equally well) and refrigerate for at least 2 hours, though overnight is even better. The filling firms up beautifully and the flavors meld together during this rest.
- Garnish before serving:
- Just before you set them on the table, scatter fresh berries over the top and add a whisper of extra lemon zest if you want that visual pop. It only takes 30 seconds and makes them look restaurant-worthy.
 Save
Save What started as panic about a last-minute dessert taught me that some of the most impressive things you can serve don't require an oven or hours of fussing. Now whenever someone says they need dessert in a hurry, these jars are the first thing I suggest.
Why These Jars Always Disappear First
There's something about individual portions that makes people feel like they're getting something special and personal. You're not cutting slices from a whole cake where everyone compares sizes—each person gets their own complete, beautiful dessert with the crust, filling, and topping all in perfect proportion. It's Psychology 101, but it works every single time.
Storage and Make-Ahead Magic
These jars are perhaps the most forgiving dessert I make because they actually improve with time. The filling sets beautifully, the flavors marry together, and you can make them 2 or 3 days ahead without any worry about them falling apart or getting soggy. Keep them covered in the fridge, and they're ready whenever you are.
Variations Worth Trying
Once you understand how this works, you start seeing variations everywhere. I've made versions with lime juice and zest, swapped in crushed pistachios for extra crunch on the crust, and even tried mascarpone instead of cream cheese for a slightly richer texture. The framework stays the same—you're building layers of crust, creamy filling, and bright topping—but the flavors can shift depending on what's in season or what mood you're in.
- Try a berry curd on top instead of lemon for a completely different flavor profile that's equally stunning.
- Crush some candied lemon peel or add it to the crust for texture and complexity.
- If you want it less tart, use less lemon juice and balance it with a little more vanilla or a touch of almond extract.
 Save
Save These little jars have become my secret weapon for looking effortlessly put-together while barely trying. Make them once and they'll become a regular in your kitchen too.
Recipe FAQs
- → How do I ensure the crust holds together well?
Mix the graham cracker crumbs thoroughly with melted butter and sugar until the texture resembles wet sand. Press firmly into the jar bottoms for a compact base.
- → Can I substitute cream cheese with another ingredient?
Yes, mascarpone can be used for a richer and smoother filling texture without altering the flavor balance significantly.
- → What is the best way to whip the cream for the filling?
Use cold heavy whipping cream and beat with a mixer until stiff peaks form to ensure lightness and volume in the filling.
- → How long should these jars be chilled before serving?
Refrigerate for at least 2 hours to allow the layers to set and flavors to meld perfectly.
- → Are there gluten-free options available?
Yes, swapping graham crackers for certified gluten-free cookies makes these jars suitable for gluten-sensitive diets.