 Save
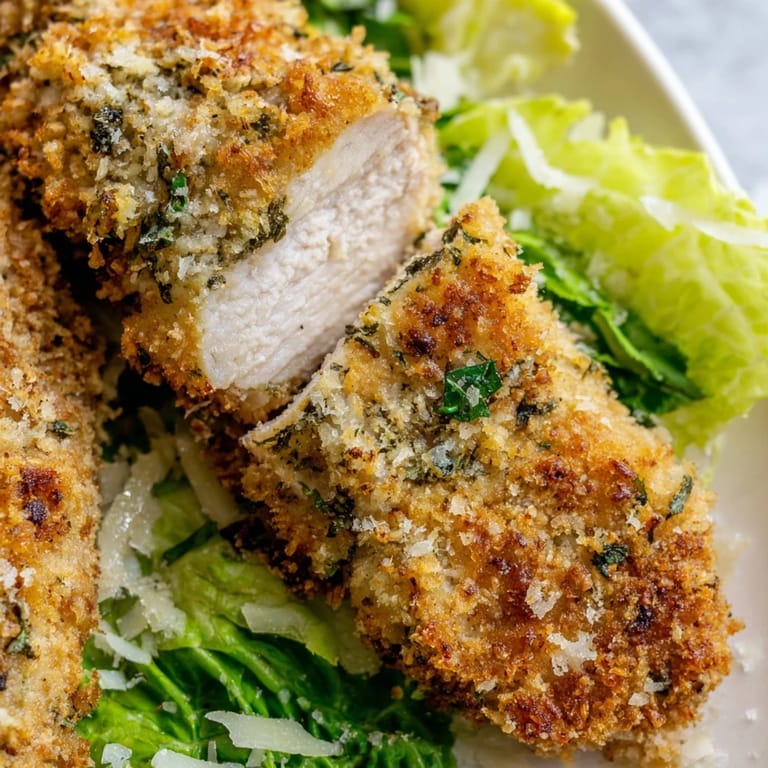
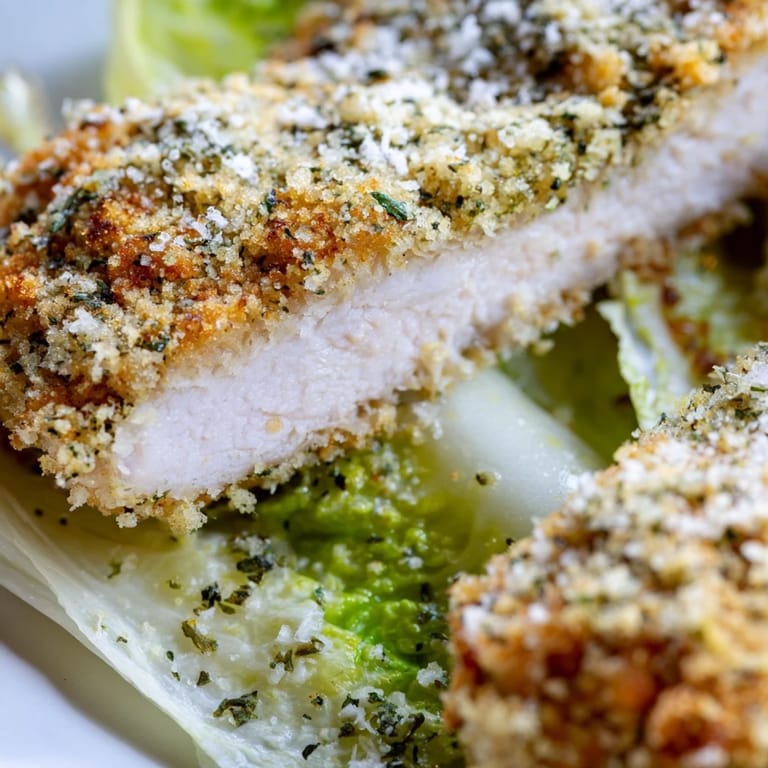
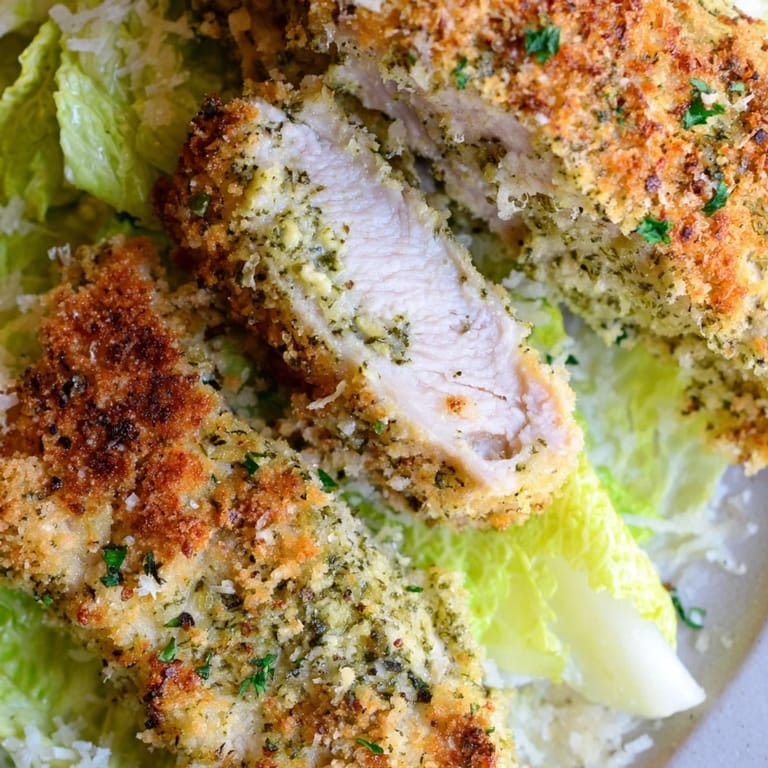
Save The smell of panko breading hitting hot oil still takes me back to my first apartment kitchen, where I learned that the secret to restaurant-style crispy chicken at home is patience with your coating stations. My roommate and I used to make these on Tuesday nights while watching cooking shows, convinced we were inventing something revolutionary. We may not have been original, but the way that Parmesan and herb crust clings to juicy chicken has made this a standby ever since.
Last summer my sister came to visit and I made these for dinner, watching her face light up at the first crunch through that golden crust. She took three pita halves before admitting shed skipped lunch, and we spent the whole meal plotting ways to upgrade the basic version. Now whenever I see her, she asks if were having the chicken pitas again.
Ingredients
- 2 large boneless skinless chicken breasts: Slice them horizontally to make four thin cutlets that cook quickly and evenly
- 1 cup panko breadcrumbs: These Japanese breadcrumbs create an irresistibly light and crispy coating
- 1/2 cup grated Parmesan cheese: Adds salty depth to the breading mixture
- 1 tablespoon chopped fresh parsley: Brings bright color and fresh flavor to the crust
- 1 teaspoon dried oregano and 1 teaspoon dried basil: Classic Italian herbs that complement the chicken perfectly
- 1/2 teaspoon garlic powder: Distributes garlic flavor evenly throughout the coating
- 1/2 cup all-purpose flour: The first coating layer that helps the egg wash adhere
- 2 large eggs and 2 tablespoons milk: Whisk together to create the binding layer for the breading
- 3 tablespoons olive oil: Enough to pan-fry until golden without greasiness
- 4 cups chopped romaine lettuce: The crisp base for your Caesar filling
- 1/3 cup Caesar dressing: Creamy tangy dressing that ties everything together
- 1/4 cup shaved Parmesan cheese: Extra salty goodness over the salad
- 4 large pita breads: Warm them up so they fold without cracking
Tired of Takeout? 🥡
Get 10 meals you can make faster than delivery arrives. Seriously.
One email. No spam. Unsubscribe anytime.
Instructions
- Slice and set up your stations:
- Cut each chicken breast horizontally to create two thin cutlets, then arrange three shallow bowls with flour, whisked eggs with milk, and the panko mixture combined with Parmesan and herbs.
- Coat the chicken:
- Dredge each cutlet in flour, shake off excess, dip into the egg mixture, then press firmly into the panko coating to ensure it sticks.
- Fry to golden perfection:
- Heat olive oil in a large skillet over medium heat and cook chicken for 3 to 4 minutes per side until deeply golden and cooked through.
- Warm the pitas:
- Toss pita breads into a dry skillet or warm oven for just a minute or two until soft and pliable.
- Assemble and serve:
- Slice the crispy chicken into strips, cut pitas in half, and fill each pocket with Caesar salad and chicken strips.
 Save
Save These pitas became my go-to dinner after a long day at work when I want something comforting but not heavy. Theres something deeply satisfying about biting through that crispy crust into cool creamy lettuce all wrapped up together.
Making It Your Own
Once you master the basic breading technique, the variations are endless. I have added everything from smashed garlic to lemon zest into the panko mixture depending on my mood.
Perfect Pairings
A simple cucumber salad with yogurt dressing cuts through the richness beautifully, or you could serve with roasted vegetables for a more complete meal. Cold beer or crisp white wine balance the crispy chicken perfectly.
Leftover Magic
Any extra breaded chicken reheats surprisingly well in a toaster oven, though the microwave will make it sad and soggy. The components also work separately over pasta greens or in grain bowls.
- Store assembled pitas separately from the chicken if meal prepping
- The breading mixture can be made in bulk and kept frozen for future dinners
- Extra Caesar dressing makes a great dip for the pita edges
 Save
Save Hope these chicken pitas become a weeknight staple in your kitchen too. There is something magical about crispy chicken and cool crunchy lettuce all wrapped up together.
Recipe FAQs
- → How do I keep the pita bread from tearing when filling?
Warm the pitas first in a dry skillet for 1-2 minutes until soft and flexible. This makes them more pliable and less likely to split. Don't overfill—leave some room to close the pocket easily.
- → Can I bake the chicken instead of frying?
Yes, arrange the breaded cutlets on a baking sheet coated with cooking spray. Bake at 400°F for 20-25 minutes, flipping halfway through, until golden and cooked through to 165°F internally.
- → What's the best way to get the breading to stick?
Make sure each cutlet is thoroughly dried before breading. Press the panko mixture firmly onto the chicken to create an even coating. Let the breaded cutlets sit for 5 minutes before cooking to help the coating adhere.
- → Can I make these ahead of time?
The components can be prepped separately up to a day ahead. Store the cooked chicken, dressed salad, and pitas in separate containers. Assemble just before serving to prevent sogginess. Reheat chicken in a 350°F oven for 10 minutes.
- → What sides pair well with these pitas?
Serve with extra Caesar salad on the side, roasted vegetables like zucchini or bell peppers, or a light soup such as minestrone. Fresh fruit or a simple green salad with vinaigrette balances the richness nicely.
- → How do I know when the chicken is fully cooked?
The cutlets should be golden brown on both sides and firm to the touch. Use an instant-read thermometer inserted into the thickest part—it should register 165°F. If in doubt, cut into the center to verify the meat is opaque throughout.